UITableView可以说是iOS开发中最常用的控件之一了,常用于展示表单及列表类数据。
UITableView
如何展示数据
设置数据源对象
1 | self.tableView.dataSource = self; |
数据源对象要遵守协议
1 | @interface ViewController () <UITableViewDataSource> |
实现数据源方法
1 | // 多少组数据 |
tableView的常见设置
1 | // 设置每一行cell的高度 |
UITableViewCell
UITableViewCell的常见设置
1 | // 设置右边的指示样式 |
cell的循环利用
传统的写法
1 | /** 每当有一个cell要进入视野范围内,就会调用一次 |
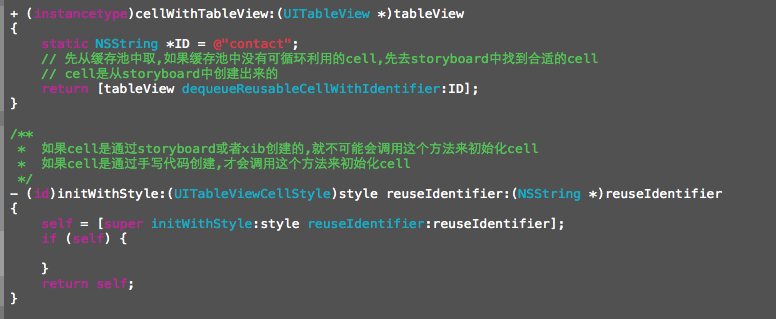
新的写法(注册cell)
1 | NSString *ID = @"wine"; |
cell的高度的新的计算方式
- iOS8新增加预估高度(self-sizing)
1 | // 告诉tableView所有cell的高度是自动计算的(根据设置的约束) |
自定义下划线
- 不需要去掉原来的下划线,就可以实现在有内容的时候,下面显示出下划线,没有内容的地方不会出现下划线。
1 | // 添加分割线的取巧方法 |
- 另一种自定义下滑线的方式就是在cell最下面自定义一个高度为1的UIView,这种方法需要去掉原来的下划线。
1 | // 去掉自带的分割线 |
如何利用xib封装一个cell
- 新建一个xib文件描述一个cell的内部结构
- 新建一个新的类(继承自UITableViewCell)
- 新建类的类名最好跟xib的文件名保持一致
- 将xib中的控件 和自定义的类 进行连线
- 提供一个类方法快速返回一个创建好的自定义的view(屏蔽从xib加载这个过程)
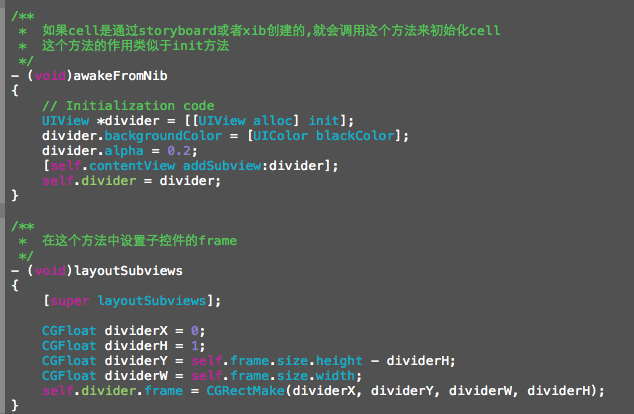
通过代码自定义cell(cell的高度不一致)
- 新建一个继承自UITableViewCell的类
- 重写
initWithStyle:reuseIdentifier:方法添加所有需要显示的子控件(不需要设置子控件的数据和frame,子控件要添加到contentView中)进行子控件一次性的属性设置(有些属性只需要设置一次, 比如字体\固定的图片) - 提供2个模型
- 数据模型: 存放文字数据\图片数据
- frame模型: 存放数据模型\所有子控件的frame\cell的高度
- cell拥有一个frame模型(不要直接拥有数据模型) (重写set方法)
- 重写frame模型属性的setter方法: 在这个方法中设置子控件的显示数据和frame
- frame模型数据的初始化已经采取懒加载的方式(每一个cell对应的frame模型数据只加载一次)
数据刷新
- 添加数据
- 删除数据
- 更改数据
全局刷新方法(最常用)
- 屏幕上的所有可视的cell都会刷新一遍
1 | [self.tableView reloadData]; |
局部刷新方法
- 添加数据
1 | NSArray *indexPaths = @[[NSIndexPath indexPathForRow:0 inSection:0], |
- 删除数据
1 | NSArray *indexPaths = @[[NSIndexPath indexPathForRow:0 inSection:0], |
- 更新数据(没有添加和删除数据,仅仅是修改已经存在的数据)
1 | NSArray *indexPaths = @[[NSIndexPath indexPathForRow:0 inSection:0], |
左滑出现删除按钮
- 需要实现tableView的代理方法
1 | /** |
左滑出现N个按钮
- 需要实现tableView的代理方法
1 | /** |
进入编辑模式
1 | // self.tabelView.editing = YES; |
在编辑模式中多选
1 | // 编辑模式的时候可以多选 |